Running Doom on macOS
I love Doom, and by Doom I mean the various classic Dooms - Ultimate Doom, Doom 2: Hell on Earth, and the Final Doom expansions. I only had Ultimate Doom shareware on my 386 as a kid but I played all of them a lot later while at university around 2005 which coincided with the release of Doom 3. This inspired me to recreate the first level from the first episode of Ultimate Doom in Doom 3. This snowballed and became a Doom 3 mod called CDoom. A team called Flaming Sheep Software was formed, and I contributed e1m1, e1m2 and (most of) e1m7. While the reimagining of the levels was obviously quite amateurish, I had a load of fun doing it (I was particularly pleased with my chainsaw reveal).
I digress. I love Doom and I wanted to play it (legally), and this post is all about how. The first place I looked was the App Store. Nothing. Next I looked on Steam. That has the various classic Doom titles but for Windows only. Hmmm…
When I was playing in 2005 there were many excellent source ports that offered lots of new gameplay features like mouse look and jump: something not previously possible in the 2.5 dimensioned originals. There were also improved graphics in the form of things like coloured and bloom lighting to high resolution support and full screen anti-aliasing. Some source ports can even load 3d model replacements for the sprites! Twenty plus years since the original, people still maintain these ports, and the ports tend to be cross-platform because people who maintain stuff like that for so long also tend to be excellent in general. The source port I wanted to run was GZDoom, the stable version of ZDoom. This was easy to install using Homebrew Cask:
brew cask install gzdoom
However, that’s just the game engine - you also need the game content, which is under copyright. Content for the Doom engine comes in the form of a WAD file so to play the game on macOS you need to get hold of the WADs for the versions of Doom you want to play, in addition to the source port.
The Windows version available through Steam must come with the WADs, so I bought that, hoping I’d be able to download it on macOS even though the executable wouldn’t run. Then I’d grab the WADs and put then somewhere GZDoom could use them. Unfortunately this wasn’t possible. Steam will not download the files for a game on a platform for which that game is not supported. That makes sense, but is a pain when you’re trying to do something like this.
I needed to download a Windows game from Steam but I don’t have Windows. Fortunately, Microsoft provide virtual machines of various versions of their operating systems bundled with various browsers for web testing. These VMs have finite lifespans to ensure that you’re only using them for temporary things, but that’s good enough for this exercise.
I went for the Windows 7/IE11 one because it’s probably smaller than Windows 10 and can still run Steam. If I were doing something I wanted to be repeatable I’d use the Vagrant option, but as this is a one off I chose the Virtual Box image. I’m not going to cover how to install Virtual Box and load the image in - there’s an excellent official manual.
Once the image is running in VirtualBox, we need a way of getting the WADs back from the guest (Windows) to the host (macOS). The approach I used is to mount a folder from the host into the guest. This is done by going into the settings for the VM, choosing the Shared Folders tab and select the Add New Shared Folder button. This gives you a dialog that looks like this:
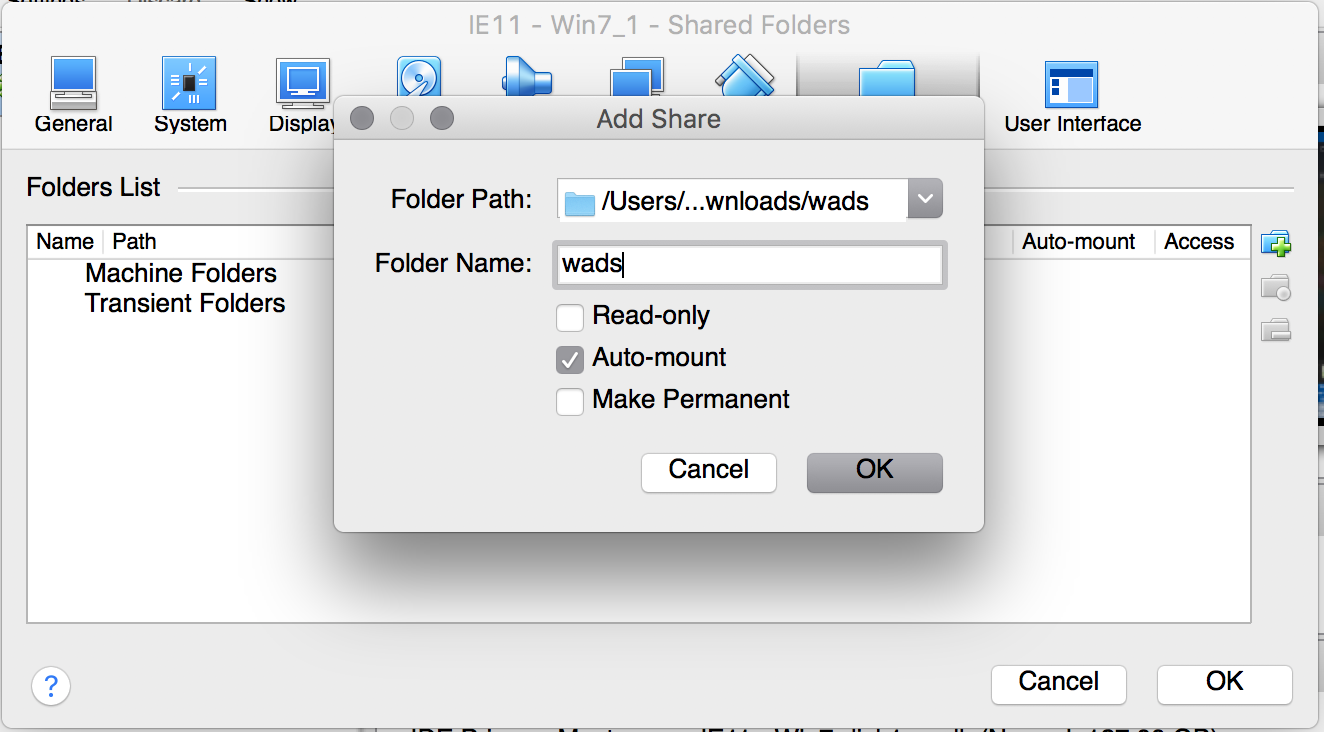
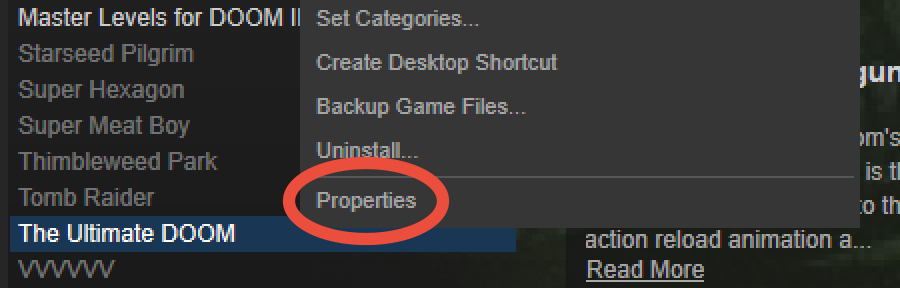
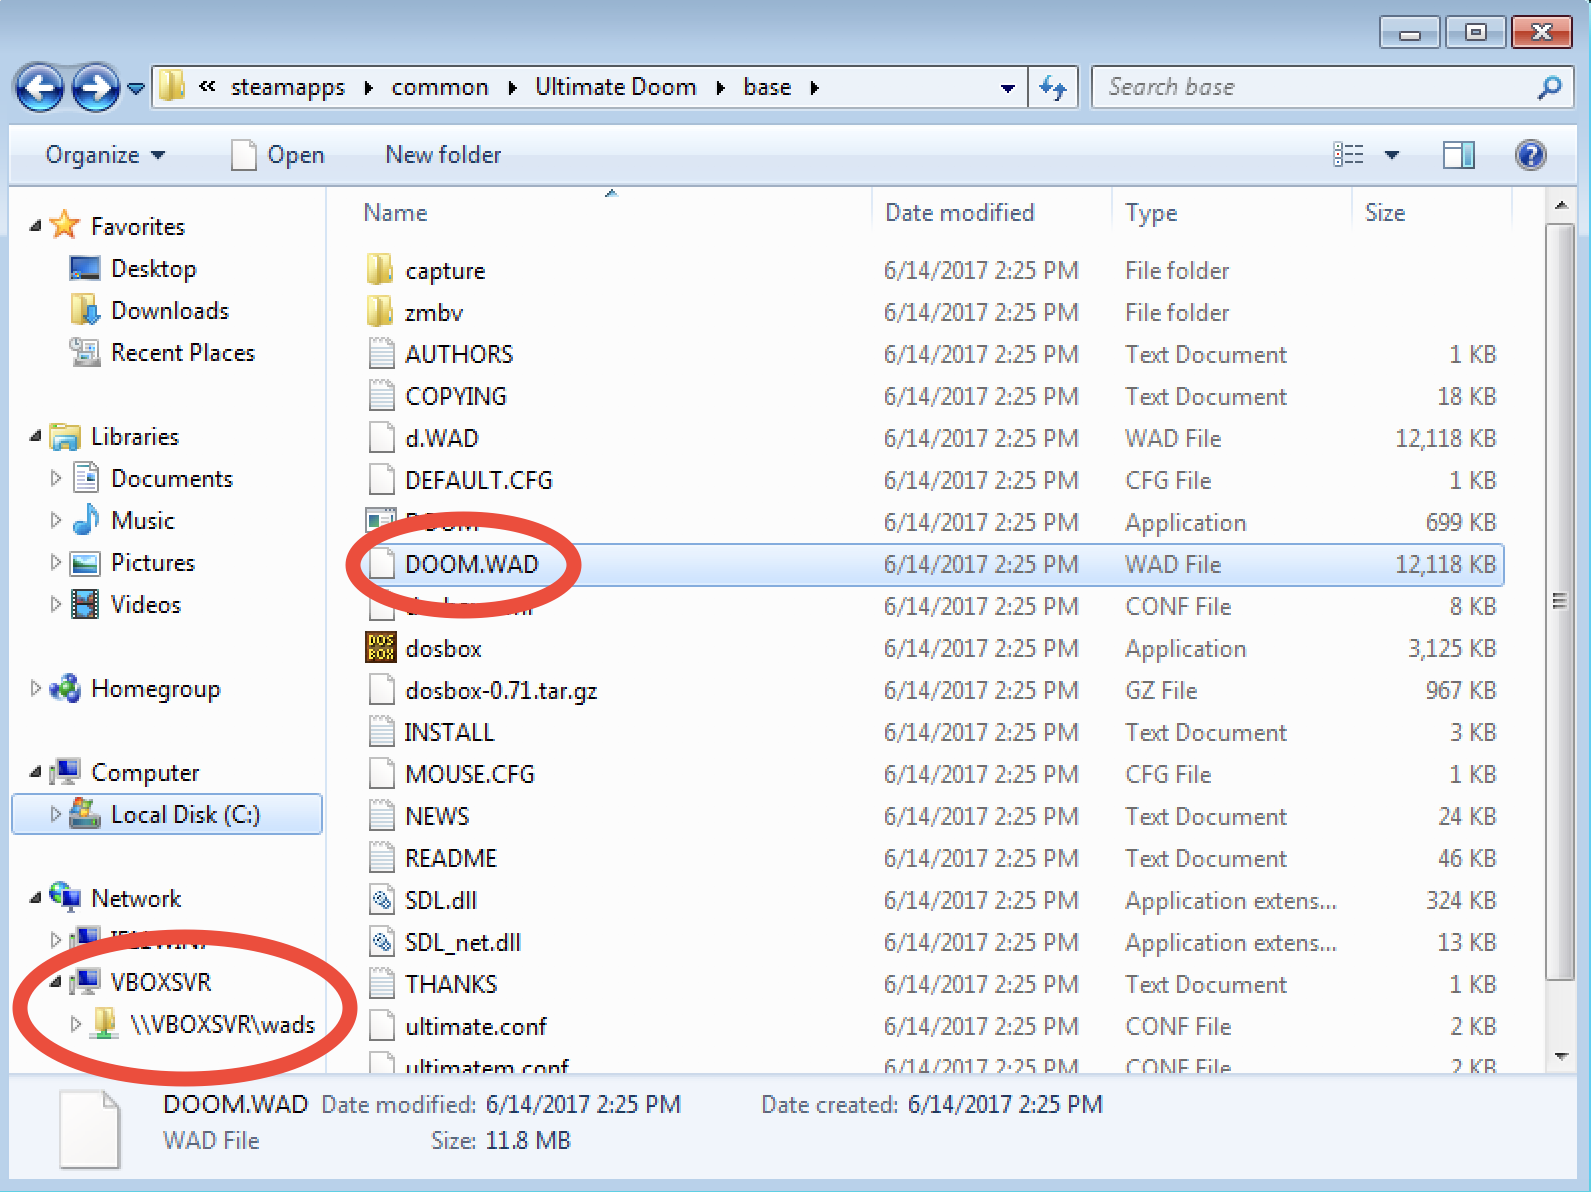
I created a new folder in ~/Downloads called “wads”. With the shared folder mounted, the next step was to install Steam and the games in the VM. This was quick because the games are only a few tens of megabytes. Then for each game we can locate the game files by right clicking on it in the library and going into the game’s properties:
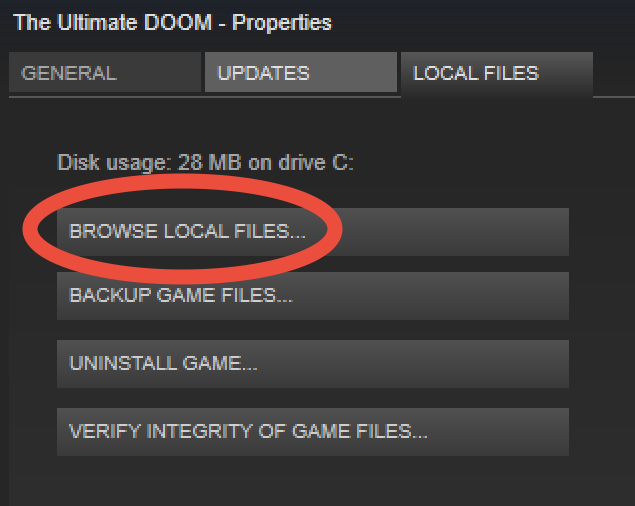
“Browse Local Files” then reveals the game files in Explorer:
Opening the folder called “base” reveals the game binaries including the WAD file. The shared folder can be found by expanding the Network tree in the sidebar, expanding the VirtualBox network device and choosing the network drive which should have the same name as the shared folder. The WAD files can then be dragged and dropped into this network drive and they’ll be available on the host.
We can verify this by checking in finder or using ls:
ls -la ~/Downloads/wads/
total 122344
drwxr-xr-x   6 andy  staff       204 14 Jun 22:38 .
drwx------+ 33 andy  staff      1122 14 Jun 22:36 ..
-rw-r--r--   1 andy  staff  12408292 14 Jun 22:25 DOOM.WAD
-rw-r--r--   1 andy  staff  14604584 14 Jun 22:24 DOOM2.WAD
-rw-r--r--   1 andy  staff  17420824 14 Jun 22:24 PLUTONIA.WAD
-rw-r--r--   1 andy  staff  18195736 14 Jun 22:24 TNT.WAD
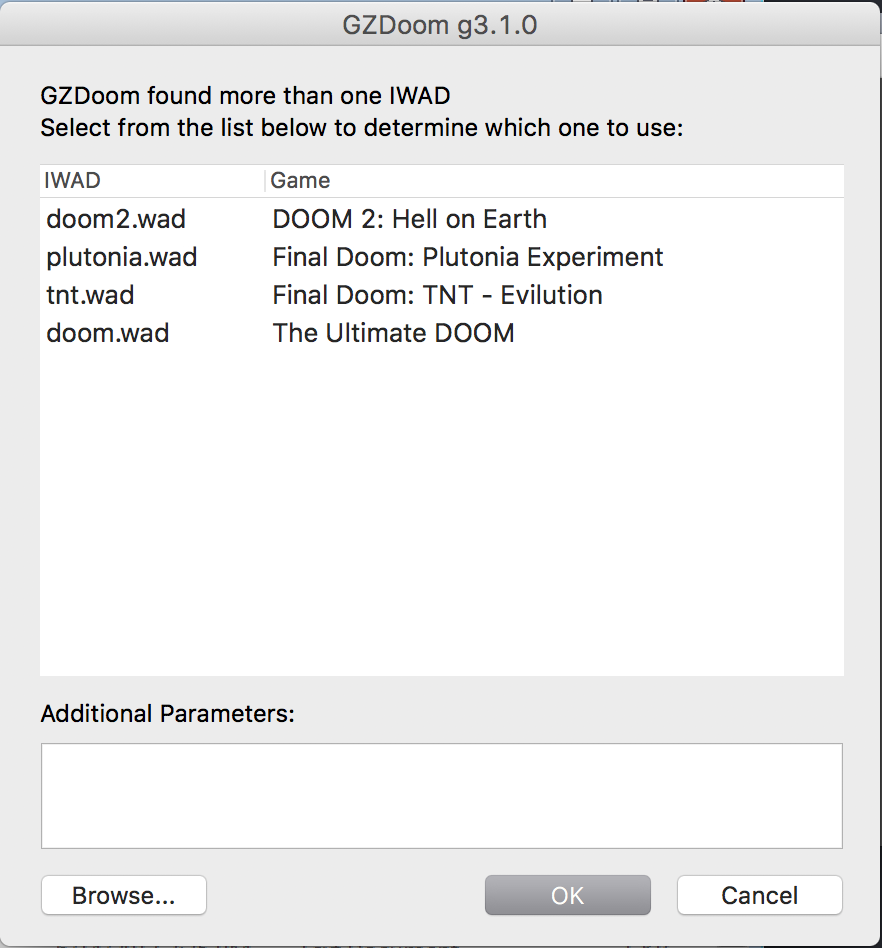
GZDoom can be invoked from the terminal with arguments that tell it where a WAD file is but if you put all the WADs you have in its search path, GZDoom will ask you which one you want to use at startup. That can be achieved in the terminal:
cp ~/Downloads/wads/*.WAD ~/Library/Application\ Support/gzdoom
Once the WADs are there, all that’s left is to run GZDoom and choose a WAD:
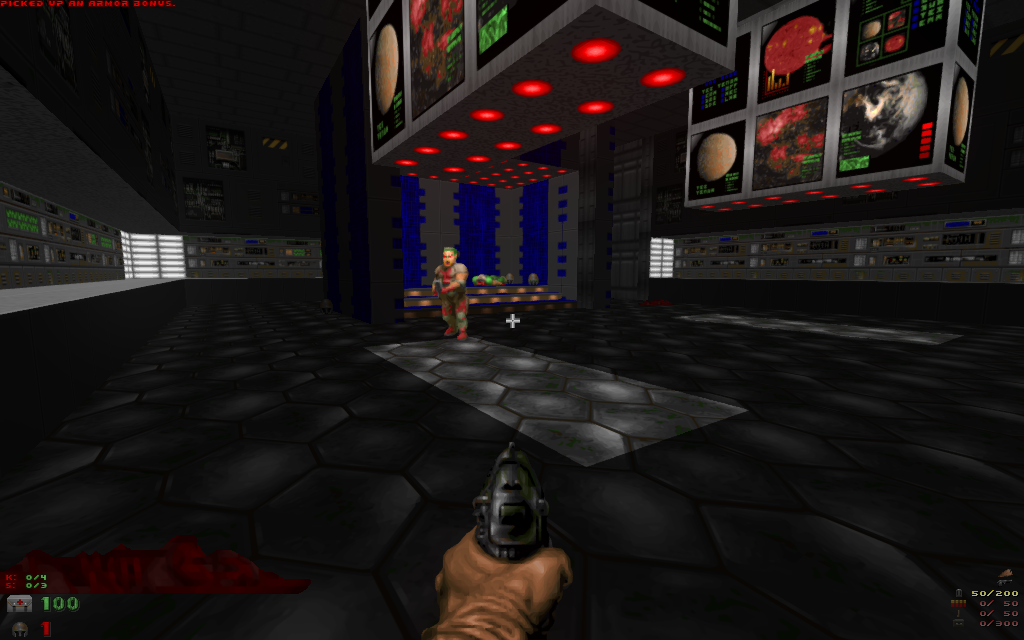
And finally start playing!